20 Proven Ways to Clean and Speed Up Windows 11, 10, and 7 for Maximum Performancexx
Over time, your computer can accumulate a lot of unnecessary files, apps, and data that take up valuable storage space and slow down its performance. Regular maintenance, such as cleaning up temporary files, uninstalling unused apps, and running system tools, can significantly improve your PC’s speed and efficiency. This guide will walk you through several easy and effective steps to clean up your system, whether you’re using Windows 11, 10, or 7. By following these simple instructions, you can keep your computer running smoothly, free up storage, and enjoy faster performance.
1. Delete Temporary Files
Temporary files are created by Windows and various apps for faster access, but they accumulate over time and take up valuable space on your computer. Deleting them can help improve performance.
How to do it:
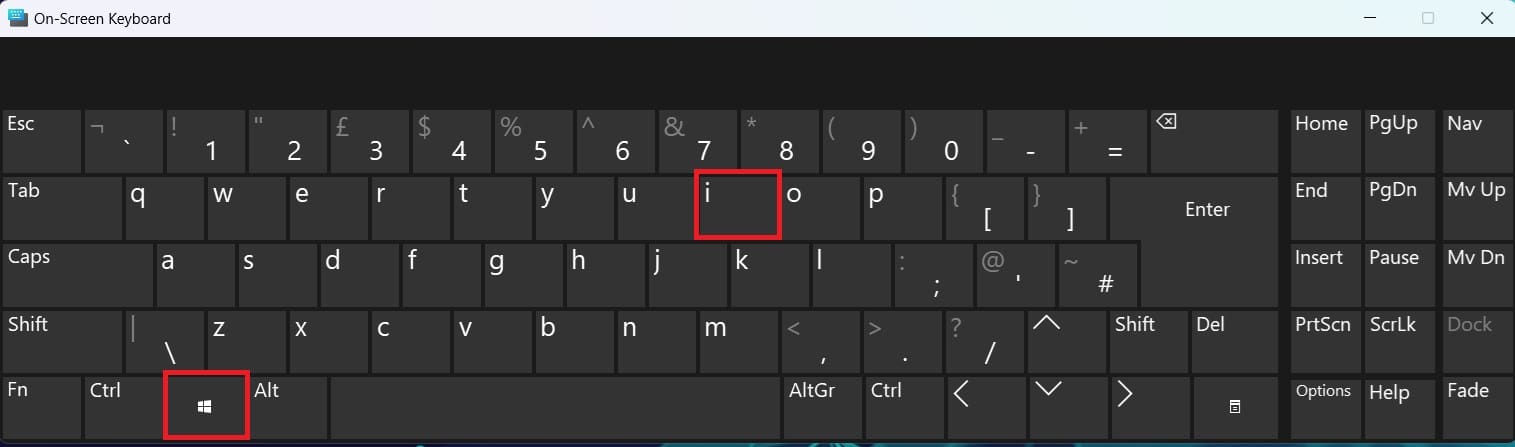
- Press Windows + I to open the Settings window.
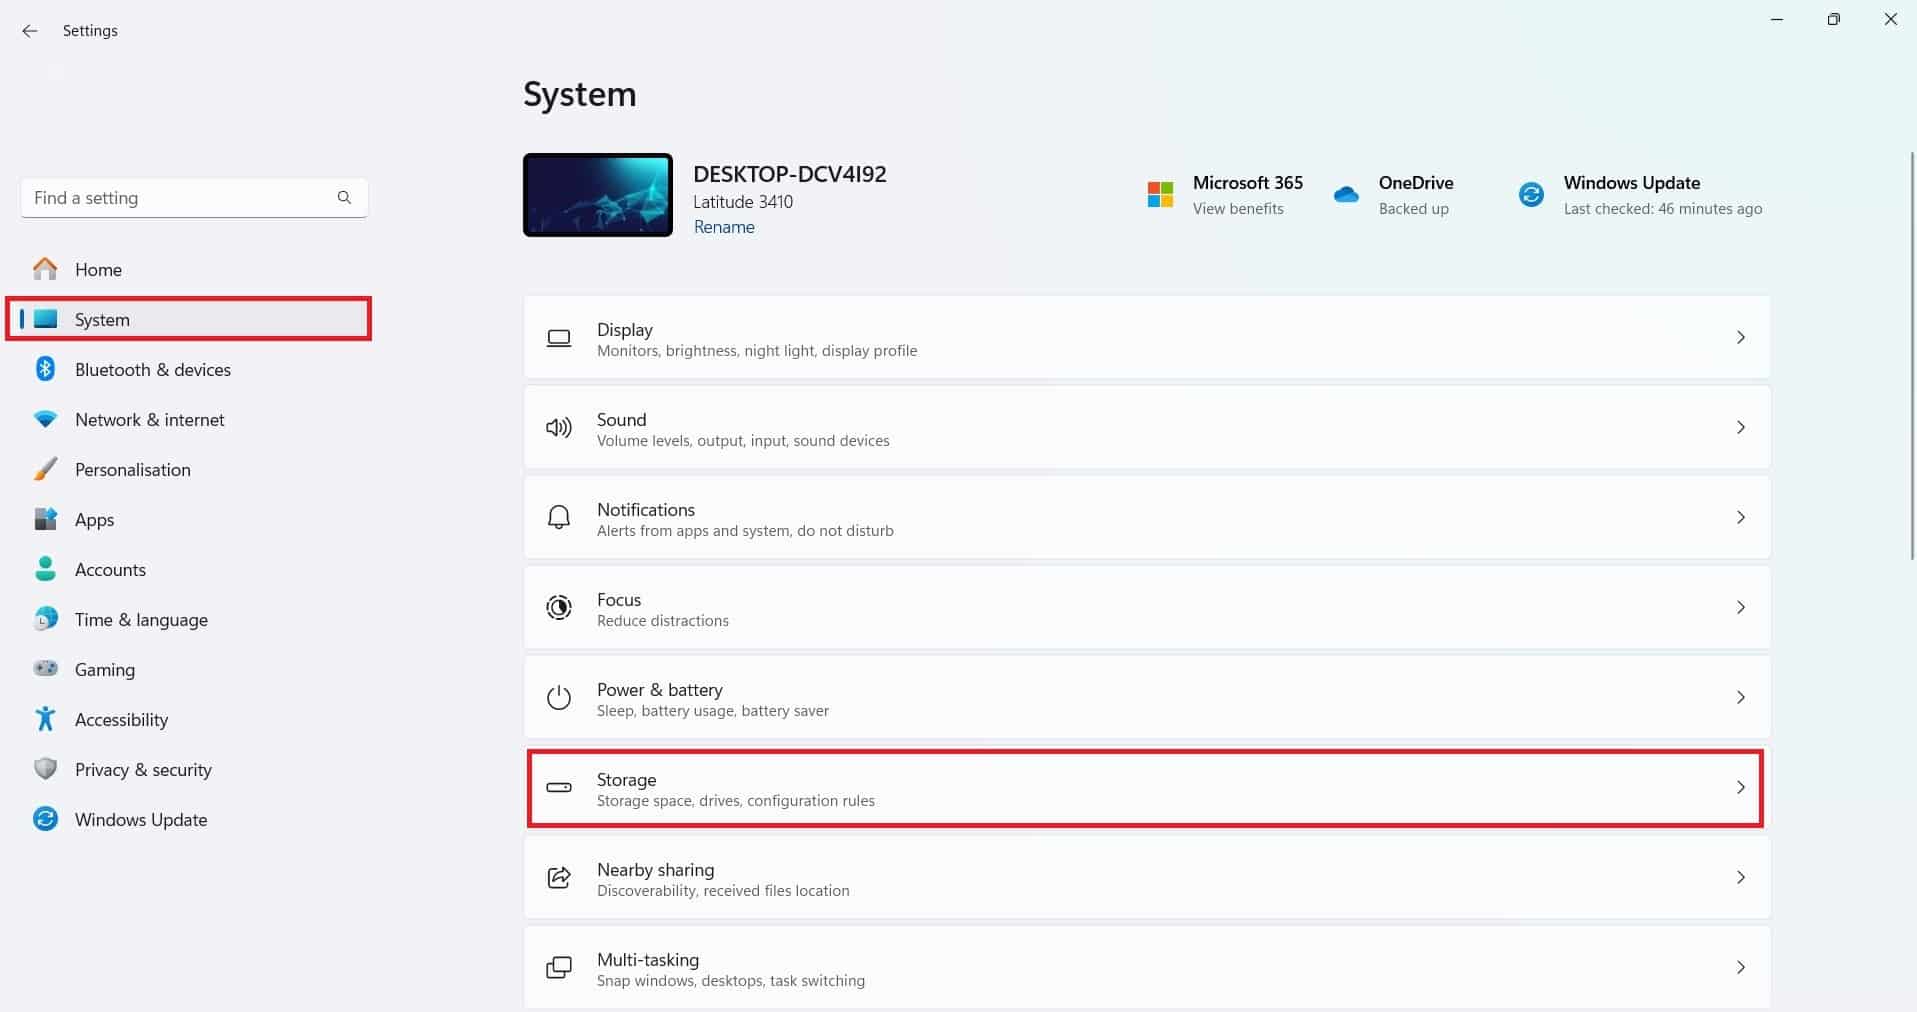
- In the left menu, click on System, then choose Storage from the options on the right.
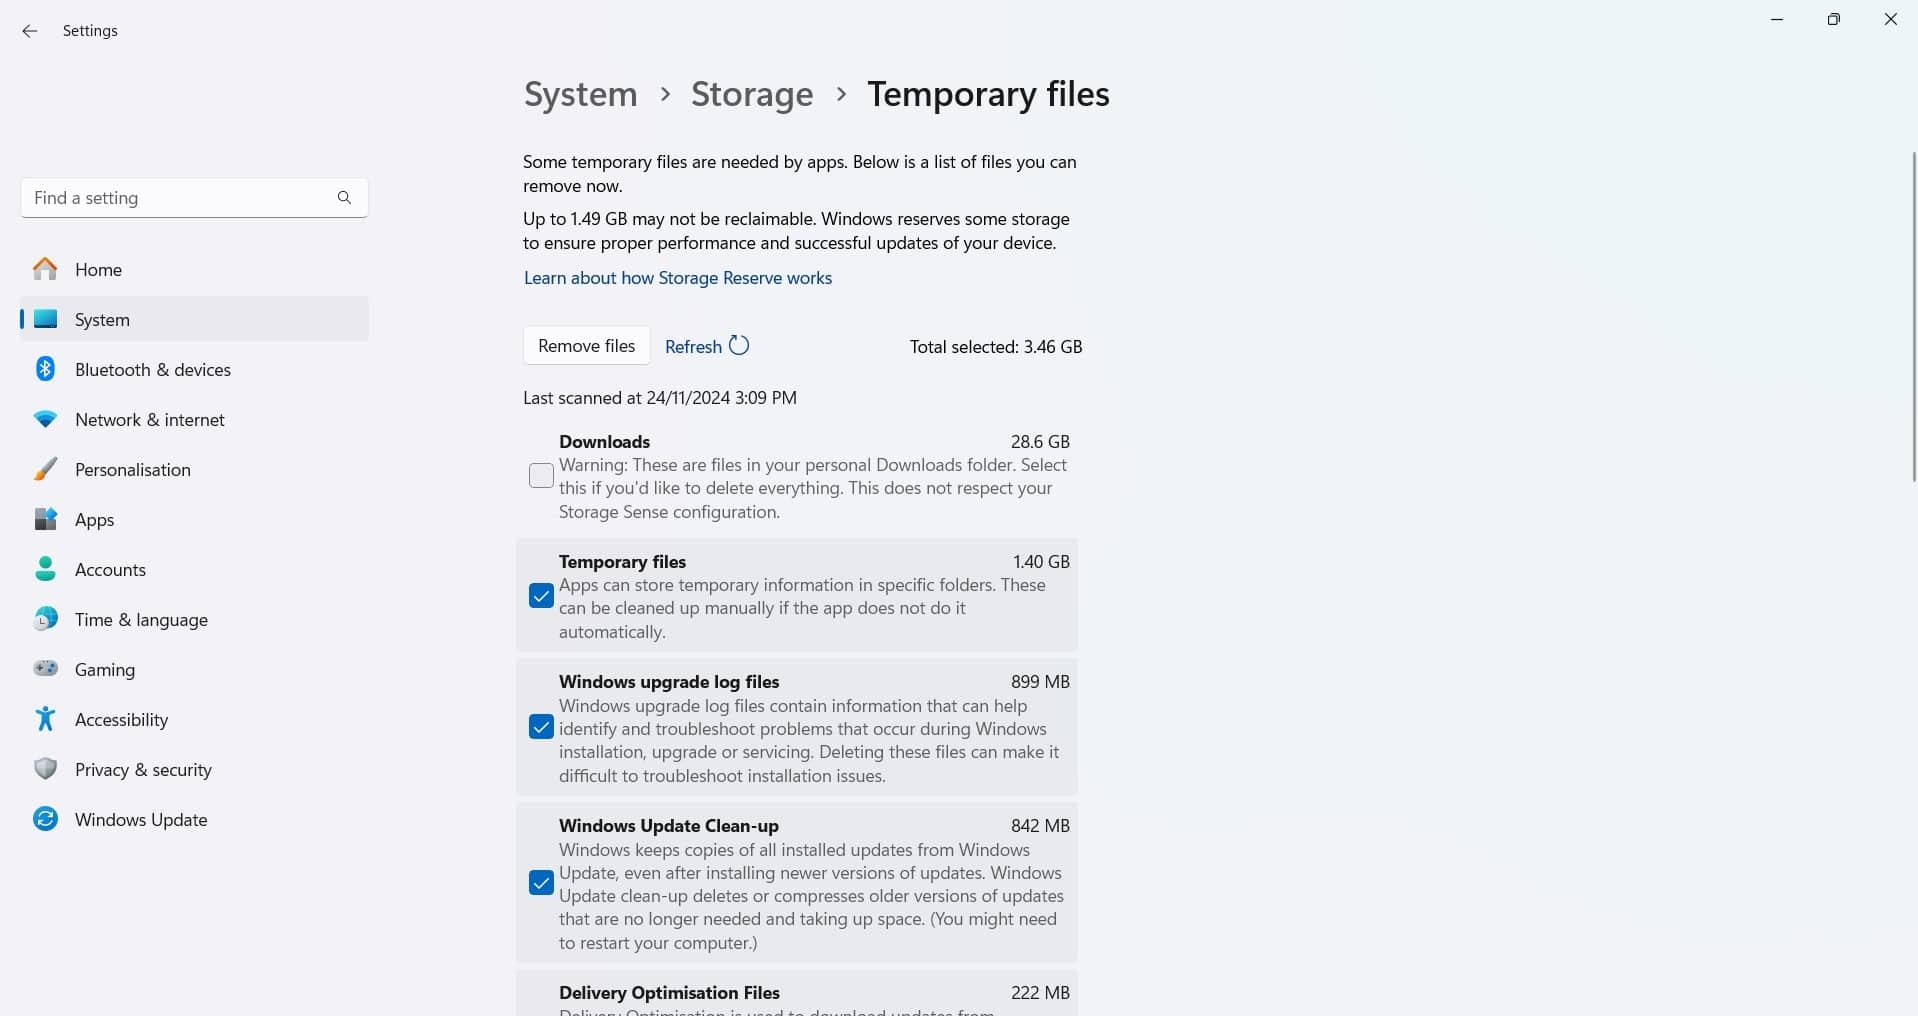
- Under the Storage section, click on Temporary files.
- A list of temporary files will appear, including system files, browser cache, and other unnecessary files.
- Tick the checkboxes next to the types of temporary files you want to delete (e.g., Windows upgrade log files, Temporary Internet files, etc.).
- Once you’ve selected the files, click Remove files to delete them and free up disk space.
- Step 1

- Step 2

- Step 3
Or Method Two
Open the Run Dialog:
- Press
Win + Ron your keyboard to open the Run dialog box.
- Press
Access the Temp Folder:
- Type
%temp%and press Enter. This will open the folder containing temporary files for your user account.
- Type
Select All Files:
- Press
Ctrl + Ato select all files in the Temp folder.
- Press
Delete the Files:
- Hold down the Shift key and press the Delete key. This will permanently delete the files without moving them to the Recycle Bin.
Confirm the Deletion:
- A confirmation dialog will appear asking if you’re sure you want to permanently delete the files. Click Yes to confirm.
Handle Any In-Use Files:
- If some files are in use and can’t be deleted, you’ll get a message saying they cannot be deleted. You can either click Skip to leave those files, or try deleting them after restarting your computer.
Empty the Recycle Bin (Optional):
- Since Shift + Delete bypasses the Recycle Bin, the files won’t appear there. However, if you deleted files elsewhere, make sure to empty your Recycle Bin to free up space.
By using Shift + Delete, you’re bypassing the Recycle Bin, ensuring that the files are permanently removed from your system.
- Step 1

- Step 2

- Step 3

Or Method Two
This guide explains how to permanently delete all files in the Windows Temp folder without sending them to the Recycle Bin. By using the Shift + Delete shortcut, you can quickly and securely remove unnecessary temporary files to free up disk space. The process involves opening the Temp folder through the Run dialog, selecting all files, and confirming permanent deletion. Any in-use files will remain untouched to avoid disrupting system operations. This method ensures a clean and efficient way to manage storage without requiring further cleanup.
- Step 1
- Step 2
- Step 3
2. Clear Browser Cache
Temporary files are created by Windows and various apps for faster access, but they accumulate over time and take up valuable space on your computer. Deleting them can help improve performance.
How to do it:
- Press Windows + I to open the Settings window.
- In the left menu, click on System, then choose Storage from the options on the right.
- Under the Storage section, click on Temporary files.
- A list of temporary files will appear, including system files, browser cache, and other unnecessary files.
- Tick the checkboxes next to the types of temporary files you want to delete (e.g., Windows upgrade log files, Temporary Internet files, etc.).
- Once you’ve selected the files, click Remove files to delete them and free up disk space.
3. Software Distrubution folder
Temporary files are created by Windows and various apps for faster access, but they accumulate over time and take up valuable space on your computer. Deleting them can help improve performance.
How to do it:
- Press Windows + I to open the Settings window.
- In the left menu, click on System, then choose Storage from the options on the right.
- Under the Storage section, click on Temporary files.
- A list of temporary files will appear, including system files, browser cache, and other unnecessary files.
- Tick the checkboxes next to the types of temporary files you want to delete (e.g., Windows upgrade log files, Temporary Internet files, etc.).
- Once you’ve selected the files, click Remove files to delete them and free up disk space.
4. Clear Browser Cache
Web browsers like Microsoft Edge and Google Chrome store cached data from websites you visit, which can help pages load faster. However, over time, this cache can accumulate and take up significant space, potentially slowing down your browser.
How to do it (for Microsoft Edge):
- Open Microsoft Edge and click the three dots in the top-right corner of the window.
- From the menu, select Settings.
- In the left-hand menu, click on Privacy, search, and services.
- Scroll down to the Clear browsing data section and click Choose what to clear.
- Tick Cached images and files (and any other data you wish to clear) and click Clear now.
How to do it (for Google Chrome):
- Open Google Chrome and click the three dots in the top-right corner.
- Select Settings from the menu.
- On the left side, click Privacy and security.
- Then, click on Clear browsing data.
- Choose Cached images and files (and any other data you want to clear) and click Clear data.
Step 1:
Step 2:
5. Uninstall Unused Apps
Over time, you may accumulate apps that you no longer use. These apps take up space on your computer and can sometimes slow down performance. Uninstalling them will help your system run more efficiently.
How to do it:
- Press Windows + I to open Settings.
- In the left menu, click on Apps, then select Apps & Features.
- Scroll through the list of installed apps or use the search box to find specific apps you no longer need.
- Click on the three dots next to an app and select Uninstall to remove it from your system.
- Confirm the uninstallation if prompted.
Step 1:
Step 2:
6. Disk Cleanup Tool
The Disk Cleanup tool is built into Windows and helps you remove unnecessary system files that could be taking up valuable disk space.
How to do it:
- Press Windows + S to open the search bar, then type Disk Cleanup and press Enter.
- Select the Disk Cleanup app from the results.
- Choose the drive you want to clean (usually C:) and click OK.
- The tool will scan for files that can be safely deleted, such as temporary files, system files, and previous Windows installations.
- Once the scan is complete, select the files you wish to remove, then click OK.
- Click Delete Files to confirm the action.
Step 1:
Step 2:
7. Run Storage Sense
Storage Sense is an automatic feature that helps clean up your system by removing temporary files, emptying the recycle bin, and deleting files you haven’t used in a while.
How to do it:
- Press Windows + I to open Settings.
- Go to System > Storage.
- Scroll down and find Storage Sense. Turn it On.
- You can click on Configure Storage Sense or run it now to set up when and how often it should clean up your files. For example, you can make it clear temporary files every month or after 30 days.
Step 1:
8. Defragment and Optimise Drives
If you’re using a traditional hard drive (HDD), defragmenting it can help improve performance. (This doesn’t apply to SSDs, which don’t need defragmentation.)
How to do it:
- Press Windows + S and type Defragment and Optimise Drives, then press Enter.
- Select your C: drive (or any other HDD), then click Optimise.
- Windows will analyse and optimise your drive, making sure files are stored more efficiently.
9. Check for Malware and Adware
Malware or adware can slow down your system and cause other issues. Running a scan helps protect your computer.
How to do it:
- Press Windows + S, type Windows Security, and press Enter.
- Click on Virus & Threat Protection.
- Click Quick Scan to check for viruses or malware. If you want a more thorough check, click Full Scan.
- If any threats are found, follow the on-screen instructions to remove them.
10. Clear System Restore Points
System restore points are saved copies of your system to help you recover if something goes wrong. Over time, these backups can take up a lot of space.
How to do it:
- Press Windows + S, type Create a restore point, and press Enter.
- In the System Properties window, go to the System Protection tab.
- Click Configure.
- In the next window, you can delete old restore points by clicking Delete. This will free up space used by these backups.
11. Disable Startup Programs
Some programs start automatically when your computer boots up, which can slow things down. You can disable unnecessary startup apps.
How to do it:
- Press Ctrl + Shift + Esc to open Task Manager.
- Go to the Startup tab.
- Right-click on programs you don’t need to start automatically and click Disable.
12. Update Windows
Keeping Windows updated is essential for performance and security.
How to do it:
- Press Windows + I to open Settings.
- Go to Windows Update and click Check for updates.
13. Update Drivers
Updating your drivers ensures your hardware runs optimally and that your system performs well.
How to do it:
- Press Windows + X and select Device Manager.
- Right-click on any device (e.g., display adapters or sound drivers) and select Update driver.
14. Clean Up Desktop
Having too many icons on your desktop can make it cluttered and slow down your computer’s performance. Try to organise them into folders or delete unnecessary ones.
15. Reboot Your Computer Regularly
Restarting your computer regularly can clear up memory and fix minor performance issues.
How to do it:
- Click the Start button, then click Power, and select Restart.